And my experience with curtains has been limited to straight, rectangular panels, so I was forced to wing it this time.
It turned out like this:
Not too bad! It's not exactly how I had pictured it, but it'll do. I'm actually pretty proud of myself, though the process of getting there was slightly comical (not to mention slow and tedious). I took a leap of faith, and photographed each step along the way -- just in case it wasn't a complete disaster in the end. The process went something like this:
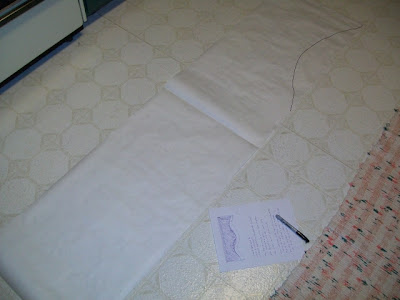
I determined that the width of a roll of waxed paper would be about right for the height of the valance (so scientific!), and cut a piece double the width of the window (72"). Then I marked the halfway point and attempted to draw a gentle curve on one side. Next, I folded the whole thing in half and cut on my line.
Not such a gentle curve after all.
But with a little more trimming it looked passable to me.
Then I fan-folded the whole thing and taped it up to my window to see how it would hang.
That didn't look quite right, so I flattened it out a bit, trimmed off some more and tried it again.
Better. Now I had a big piece of fan-folded wax paper, impossible to lay flat for cutting. So I folded the whole thing in half, wax sides together, and ironed it -- melting it into one very stiff hunk of pattern. But it was flat. Next, I pinned the bulkiest pattern ever used on the fold of my lining and fabric (folded end-to-end) and cut it out. I had to piece my prints first, because I didn't quite have two yards of either one. Funny I never thought to check that before.
Next I marked a new curve line on the pattern for the top layer of the valance. This is where I wish I had only gone two or maybe three inches shorter. I went four.
Repeated the cutting process with the second print and lining.
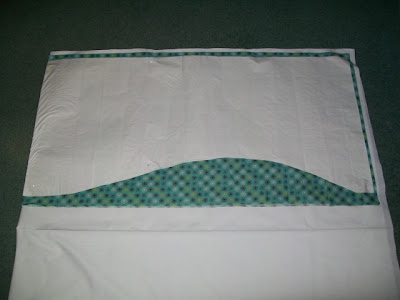
Next, I pinned both print pieces to the lining pieces, wrong sides together, and sewed the sides and bottom (1/4" seam), leaving the long, straight, top edges open.
Turned both pieces right side out and pressed.
Next, I pinned the two layers together at the top, in reverse order of how they would hang. The shorter top layer behind the longer bottom layer.
I stitched the top together with a 3/8" seam, then flipped the top layer over to the front and pressed.
At this point, I folded the valance in half and pinned it to my window to determine how far down I wanted to sew the rod pocket.
Which ended up being a 1-1/4" rod pocket, 1-1/4" from the top. (Just two seams, straight across. The space between the two panels forms the pocket.) I didn't dare make the header at the top any larger. I think I could have gone a little longer overall with the whole valance. I blame it on the wax paper. It should have been wider.
So that is how a person clueless without a pattern goes about making a patternless valance. (I can just imagine the pattern designers snickering out there. LoL) It would have been a whole lot easier to just buy the valance in the first photo at Bed Bath and Beyond... but then look at all the fun I would have missed! :/


10 comments:
Looks great! I love figuring out stuff, don't you? Your tutorial is helpful too!
And if you had bought the valance at Bed Bath & Beyond we would not have enjoyed such a great blog post!!! I think it's perfect!!! In fact, I love it and think you should consider going into the business of making valances........well, then again, maybe not. It would take time away from quilting and writing. :-)
Lots of home improvements going on--you go girl. :)
Awesome job Heather!
Awesome job Heather!
wow..that's an awesome attempt Heather...great idea of using wax paper
I think it came out great! I'm glad I'm not the only one who makes up patterns on a wing and a prayer :-)
This turned out great! I love the leap of faith we take when we take pictures of a project in progress. Yours turned into a great tutorial!
Your valance turned out better than what you would buy in the store because it's the colors that you want!! Great job. Thanks for stopping by my blog earlier this month!
I think you did a great job! I, too, try to figure out designs on my own and would tremble if a professional examined it!
But it's such a wonderful feeling of accomplishment to stand back and admire your creation. :)
Post a Comment